Getting started
To quickly get started with your own installation you can use one of these docker compose files.
Start by install git if you don’t have it already ( windows / mac / linux )
open a shell and cd to that folder you want save the files to, and type
git clone https://github.com/open-rpa/docker.git
cd docker
For almost everyone, you will want to start with docker-compose.yml, you do that by call normal-up. on windows
normal-up.bat
or linux/macos
./normal-up.sh
See Normal version for more information.
This gives you a good starting point for testing it on your local machine, and play around with the settings.
The first username and password you try to login as, will be created and made admin. This cannot be admin, root or other common administrate account names.
Once you understand how it works, and you know how to change the domain names it responds too, then you can push this to a server locally or to some cloud provider. If you have a public IP for the solution you can also have a look at docker-compose-letsencrypt.yml for a guide on how to use Lets Encrypt for certificates. For more complex setups where you don’t have public IP or just need access to wildcard certificates there is also an example on how to request Lets Encrypt certificates using DNS01 in the docker-compose-letsencrypt-dns01.yml file.
In this video the whole process is showed on ubuntu 18 
Different version
You cannot run multiple of these at the same time, with out a lot of reconfiguration, that is beyond the scope of this document.
Normal version
docker-compose.yml is the “plain” version, with only open source features, running on your localhost using http://localhost.openiap.io
Normal version on Windows
You start it by running normal-up.bat You stop it by running normal-down.bat You can check for updates using normal-pull.bat You will need to run normal-up.bat after running normal-pull.bat You can delete all data, by first running normal-down.bat and then remove-data.bat ( you must stop all agents manually first )
Normal version on linux and macos
You start it by running ./normal-up.sh You stop it by running ./normal-down.sh You can check for updates using ./normal-pull.sh You will need to run ./normal-up.sh after running ./normal-pull.sh You can delete all data, by first running ./normal-down.sh and then ./remove-data.sh ( you must stop all agents manually first )
You can access RabbitMQ Admin Interface at http://mq.localhost.openiap.io Each agent started inside OpenCore, will be listening at username.localhost.openiap.io
Premium demo version
docker-compose-ee.yml is a demo of the premium features. running on your localhost using http://localhost.openiap.io This version cannot run with other domains, without a valid license
Premium version on Windows
You start it by running ee-up.bat You stop and delete it by running ee-down.bat You can check for updated images using ee-pull.bat You can delete all data, by first running ee-down.bat and then remove-data.bat ( you must stop all agents manually first )
Premium version on linux and macos
You start it by running ./ee-up.sh You stop and delete it by running ./ee-down.sh You can check for updated images using ./ee-pull.sh You can delete all data, by first running ./ee-down.sh and then remove-data.bat ( you must stop all agents manually first )
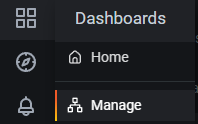
Then you can access grafana at http://grafana.localhost.openiap.io After signing in to grafana you can access a few sample dashboards by going to Manage 
If enabled in the yml file, you can also access
- Access Grafana at http://grafana.localhost.openiap.io
- Access RabbitMQ Admin Interface at http://mq.localhost.openiap.io
- Each agent started inside OpenCore, will be listening at username.localhost.openiap.io
OpenCore with SSL using lets enrypt
docker-compose-letsencrypt.yml is the “plain” version, but with traefik configured to request certificates using lets encrypt.
This will ONLY work if you setup docker on a server with a public IP address, and configure your own DNS as explained in Using custom domain names with this IP address. Then do a copy’n’paste of “localhost.openiap.io” to the domain you configured
You start it by running letsencrypt-up.bat ( or docker compose -f docker-compose-letsencrypt.yml -p demo up -d ) You stop and delete it by running letsencrypt-down.bat ( or docker compose -f docker-compose-letsencrypt.yml -p demo down ) You can check for updated images using letsencrypt-pull.bat ( or docker compose -f docker-compose-letsencrypt.yml -p demo pull )
If enabled in the yml file, you can also access
- Access MongoDB Web Editor at http://express.localhost.openiap.io
- Access RabbitMQ Admin Interface at http://mq.localhost.openiap.io
- Each agent started inside OpenCore, will be listening at username.localhost.openiap.io
Using custom port
This setup does not support using a custom port. Only port 80 or 443 is supported.
Using custom domain names
All examples use localhost.openiap.io for domain. This domain points to your localhost ( 127.0.0.1 ) and there for only works on your local machine. To allow other clients to connect, or if you did this on a hosting/cloud server somewhere, you need to use your own DNS to access your instance.
First find the IP if your machine. If used on the local network only, use the IP of the machine with docker, if you are in the cloud, use the public IP given to that machine.
You need to add 2 DNS record at your DNS provider, one for OpenCore it self, and and for all the services under that OpenCore ( MQ, agent’s, etc. )
First add one A record for OpenCore, pointing to the IP of the docker host. ( in this example your domain is mydomain.com )
opencore A 10.0.1.1
Next add an wildcard * record for all the services exposed from that instance, as a CNAME pointing to the instance
* CNAME opencore.mydomain.com.
( a few DNS providers does not allow to create wildcard records using CNAME, in that case use an A record pointing to the same IP )
Once complete, open the docker compose file
- add an environment with the name
domainand the value of domain you chose ( in the above exampleopencore.mydomain.com) - Do a search and replace for
localhost.openiap.ioand replace it with the domain you choise ( in the above exampleopencore.mydomain.com)
Troubleshooting tips
special note for people using MacOS, you need to update the volume for traefik.
If you are getting error 404 in the browser when trying to connect, and the log/console of traefik is showing errors connecting to the docker pipe,
then open docker-compose.yml find the two lines that say ( under traefic and under api )
- "//var/run/docker.sock:/var/run/docker.sock:ro"
and change them to
- "/var/run/docker.sock:/var/run/docker.sock"
Rabbitmq can sometimes take a long time to start, have a patience ( up to a few minutes ) then start logging at logs.
If something is not working, make sure all instances are running, if on windows client simply open the docker UI and expand the project. for everyone else you can use
docker compose -f docker-compose.yml -p demo ps
and make sure all is running

If one is not running, check the logs by specifying the service name ( SERVICE table ) for instance to watch web logs
docker compose -f docker-compose.yml -p demo logs web
If you want to watch the logs lice you can add the follow flag
docker compose -f docker-compose.yml -p demo logs web -f
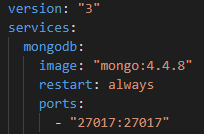
1) Its a know issue rabbitmq can take a bit long to startup on docker desktop that will make the web instances restart a few times until rabbitmq is responding. 2) It’s a know issue that with mongodb 5 you need to be running on a processor that supports AVX and have an updated docker installation. A work around can be to specify you want to use mongodb 4 instead

For questions or help, feel free to join the community on the forum or rocket chat.
For help with running on kubernetes or self hosting, feel free to contact OpenIAP for a commercial support options.