Using OpenCore Forms
Create a Form in OpenCore
In this section, users will learn how to create a Form in OpenCore. Refer to the Forms section for more information.
-
Navigate to the Forms page and click the
Add Formbutton.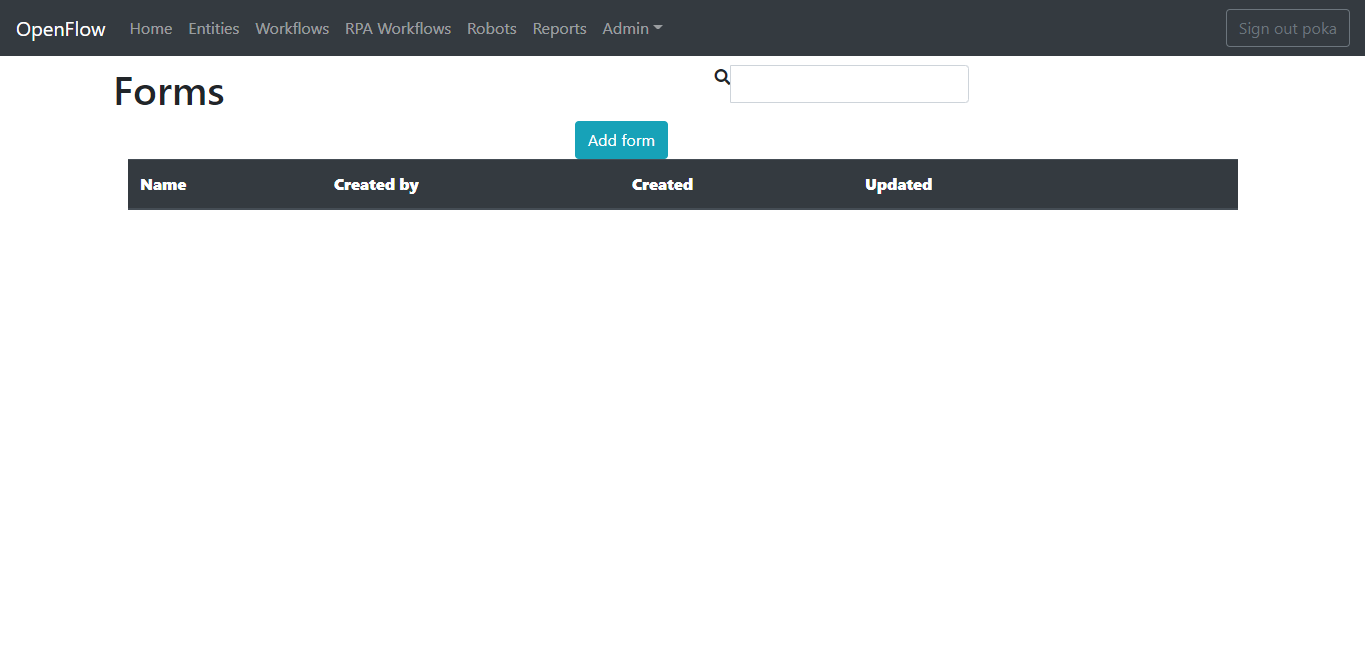
-
Drag a
Text Fieldform to the Form designer.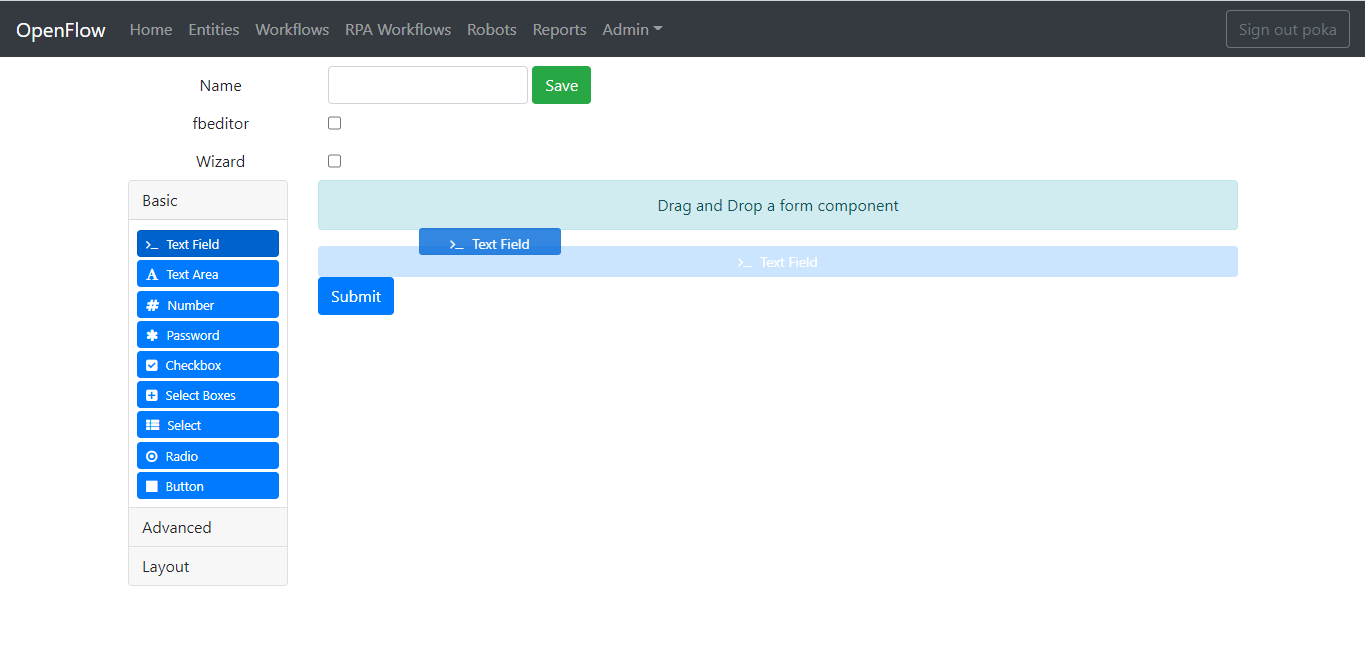
-
Change the
Labelparameter toPlease enter 'Hello from OpenCore!' below.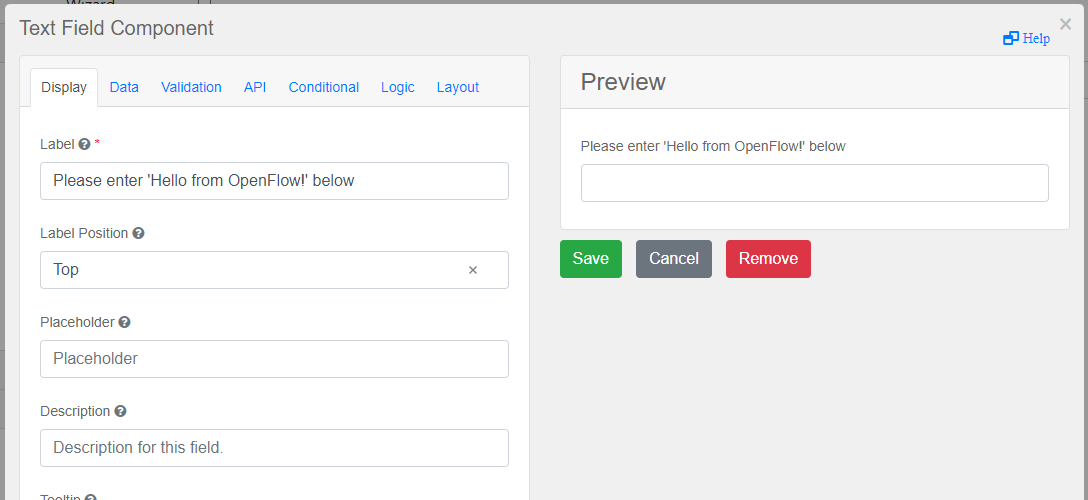
-
Click on the
APItab and change theProperty Nametohello_from_openflow.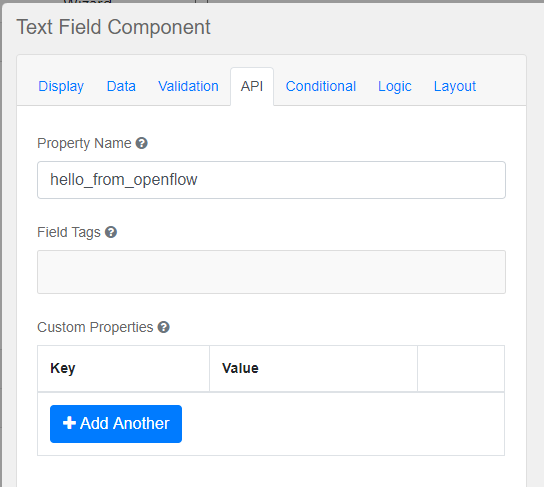
-
Click the
Savebutton, set the Form name ashellofromopenflow, and save it.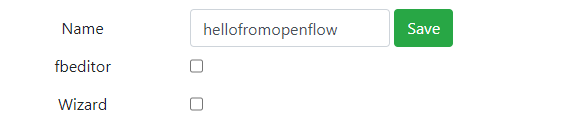
Congratulations! You have successfully configured a Form in OpenCore.
Configure Form in Node-RED
Next, learn how to configure the Form in Node-RED.
-
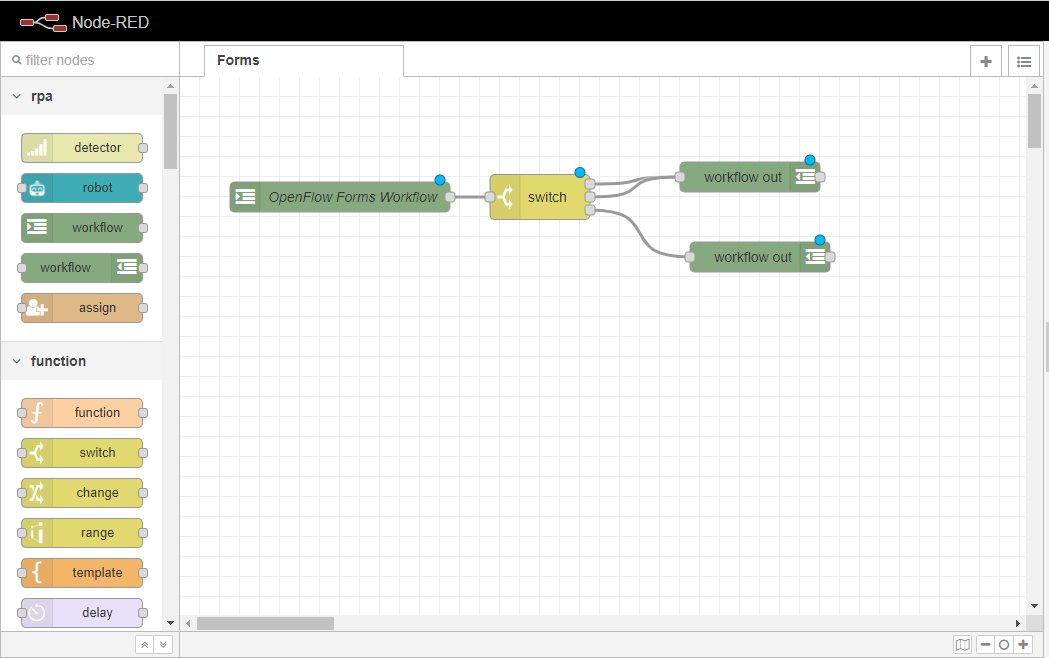
Create a new flow in Node-RED and rename it to
Forms.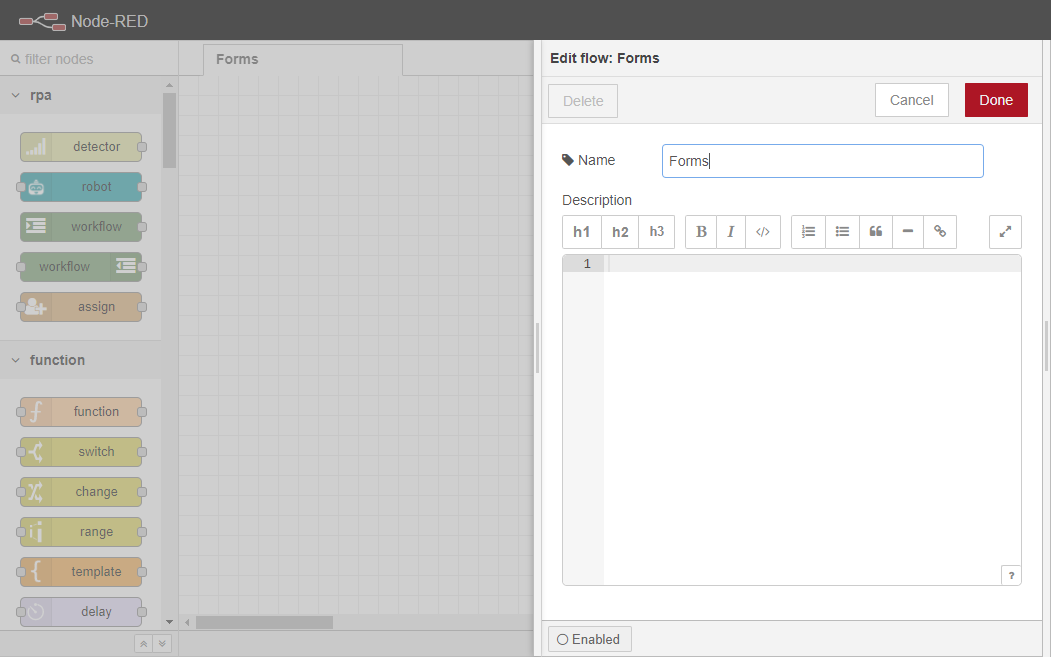
-
Drag a
workflow innode to the workspace.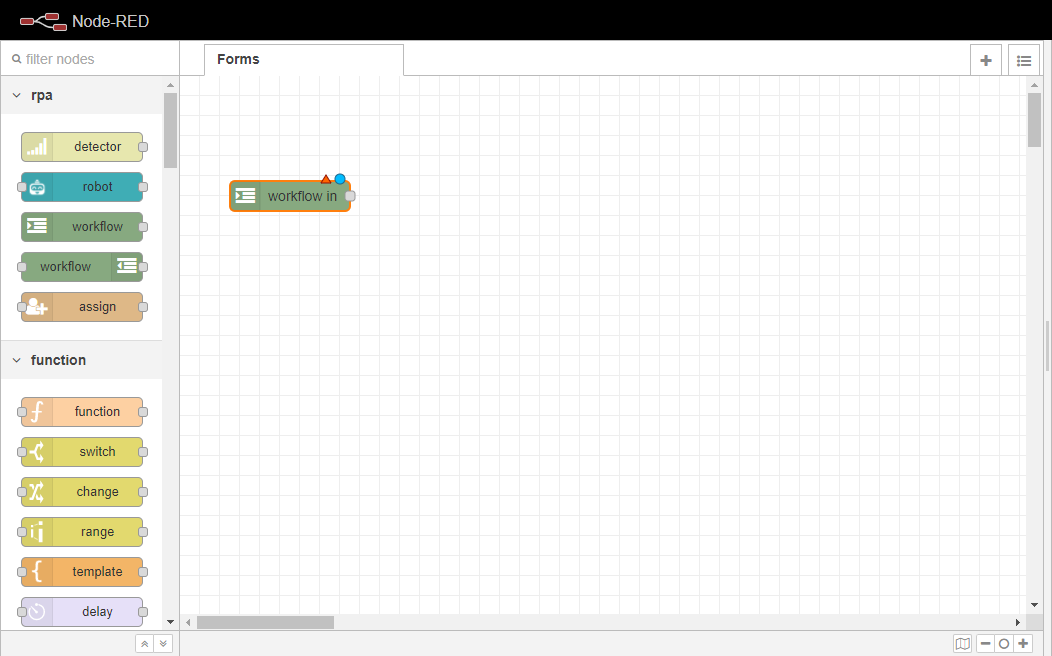
-
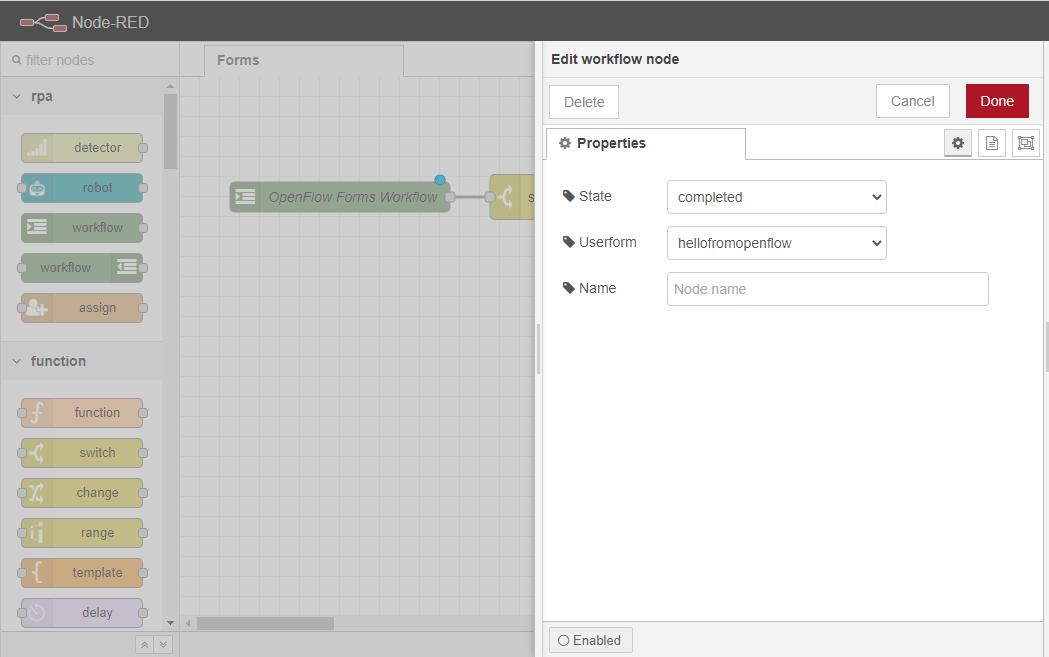
Set up the
workflow innode properties.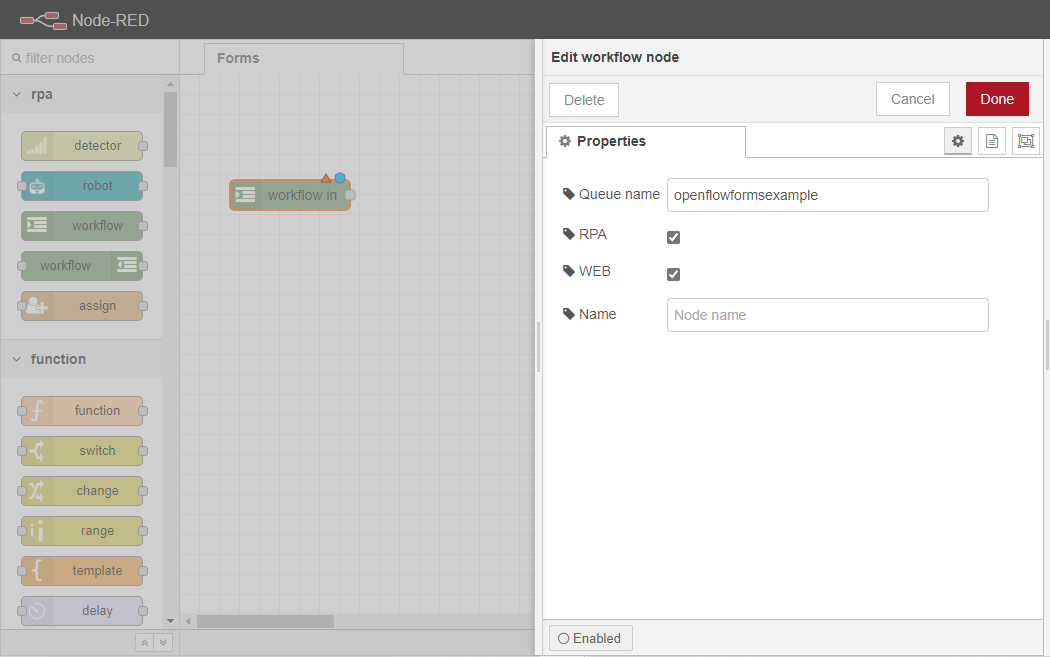
-
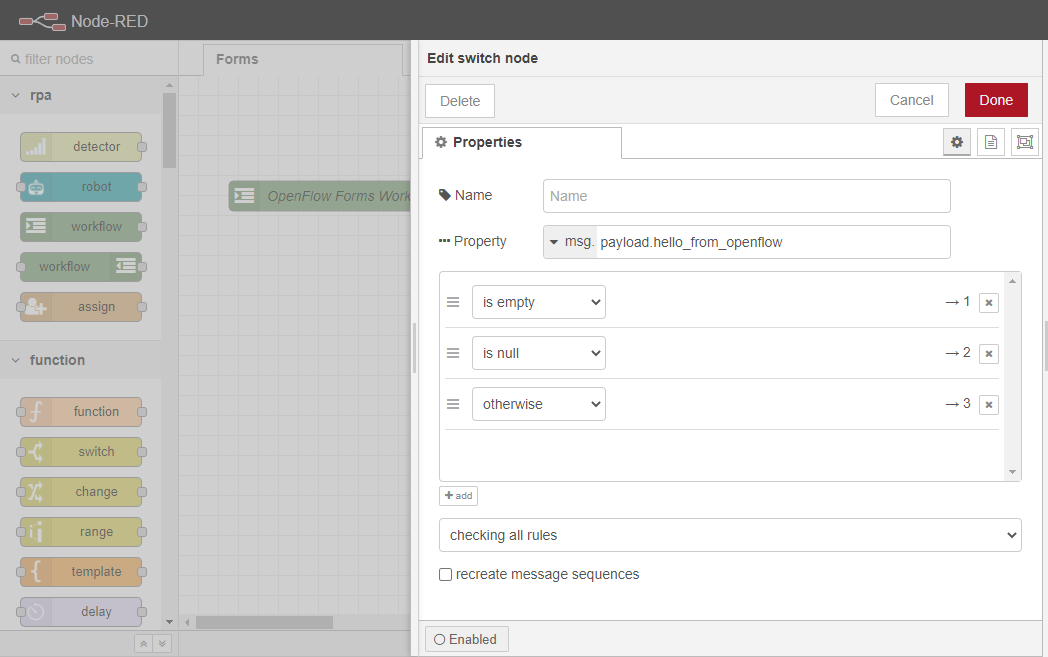
Drag a
switchnode and configure it for processing the variable returned from the Form.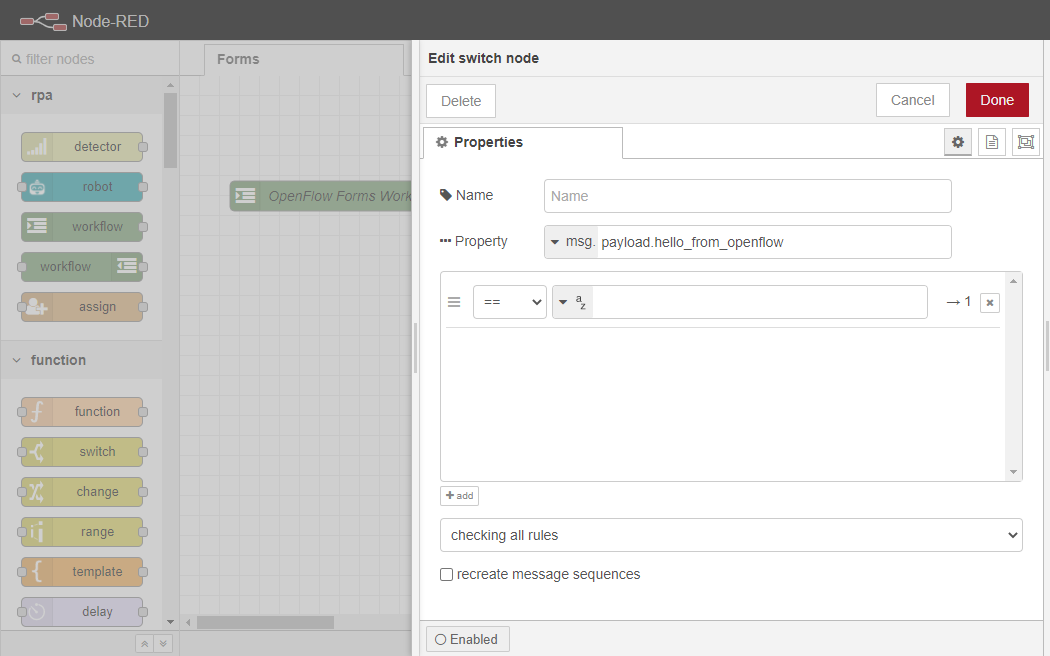
-
Drag
workflow outnodes and configure them based on the user input.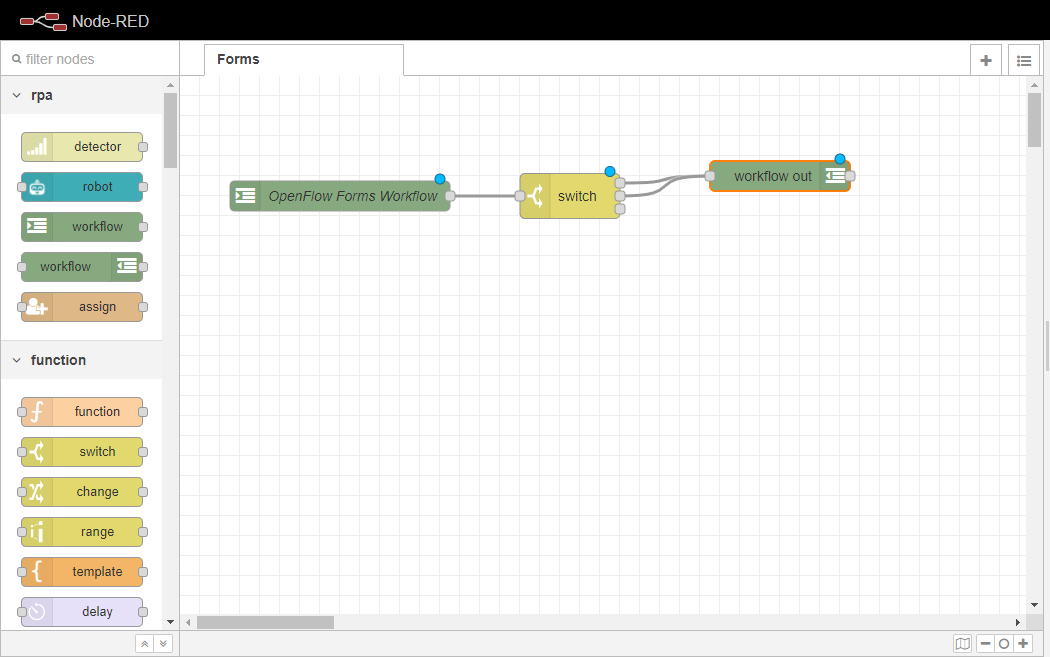

-
Add a
debugnode to observe the message passed into the Form.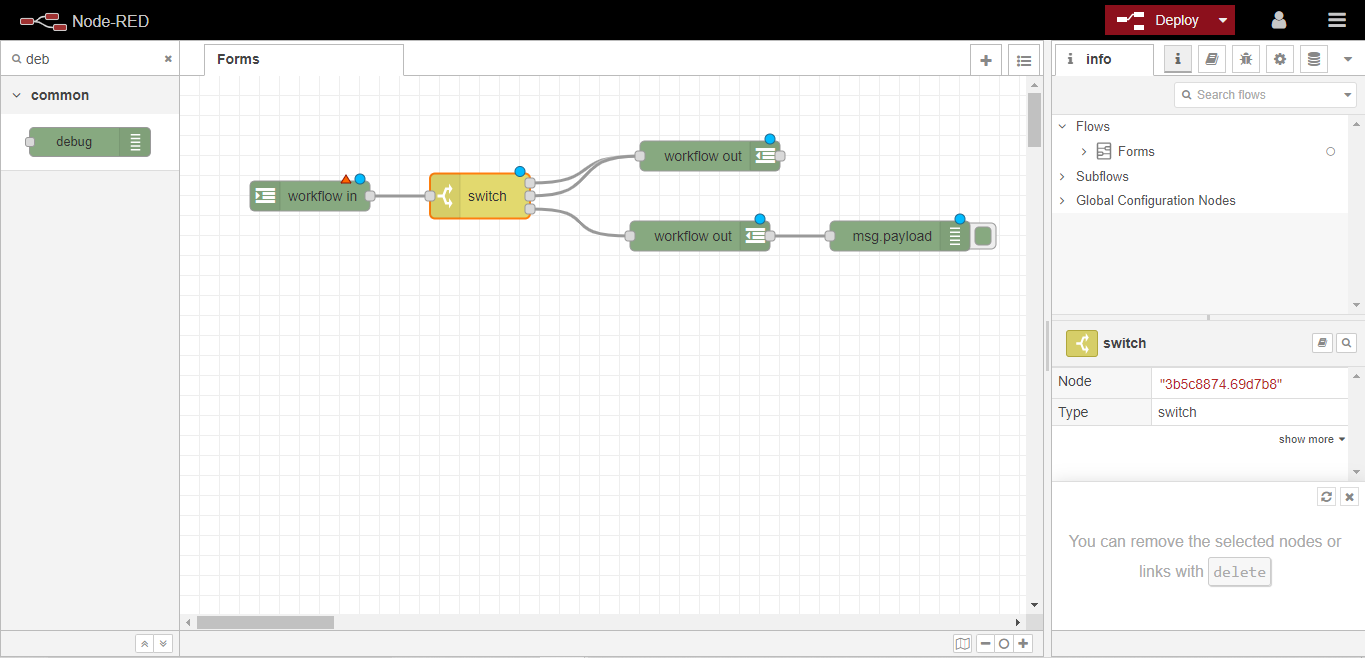
-
Deploy the configuration.
Now your Form is configured in Node-RED and ready to be used!
Invoking the Form
In this section, users will learn how to invoke the Form just created using Node-RED.
-
Drag an
injectnode to the workspace.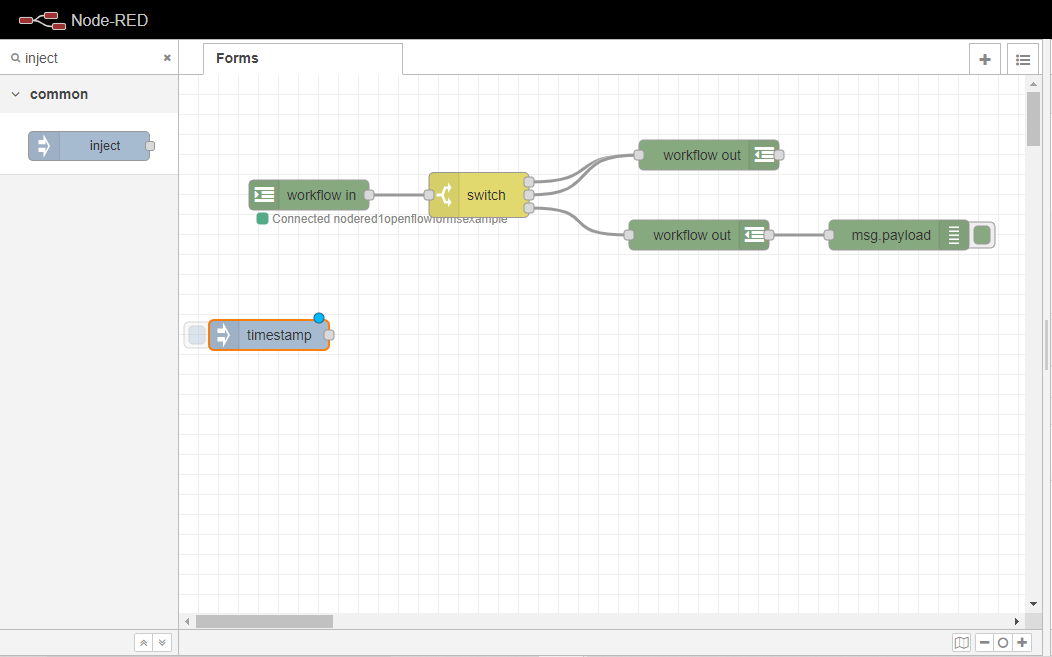
-
Drag an
assignnode to the workspace and wire it to theinjectnode.
-
Configure the
assignnode’s properties to assign the Workflow toopenflowformsexample.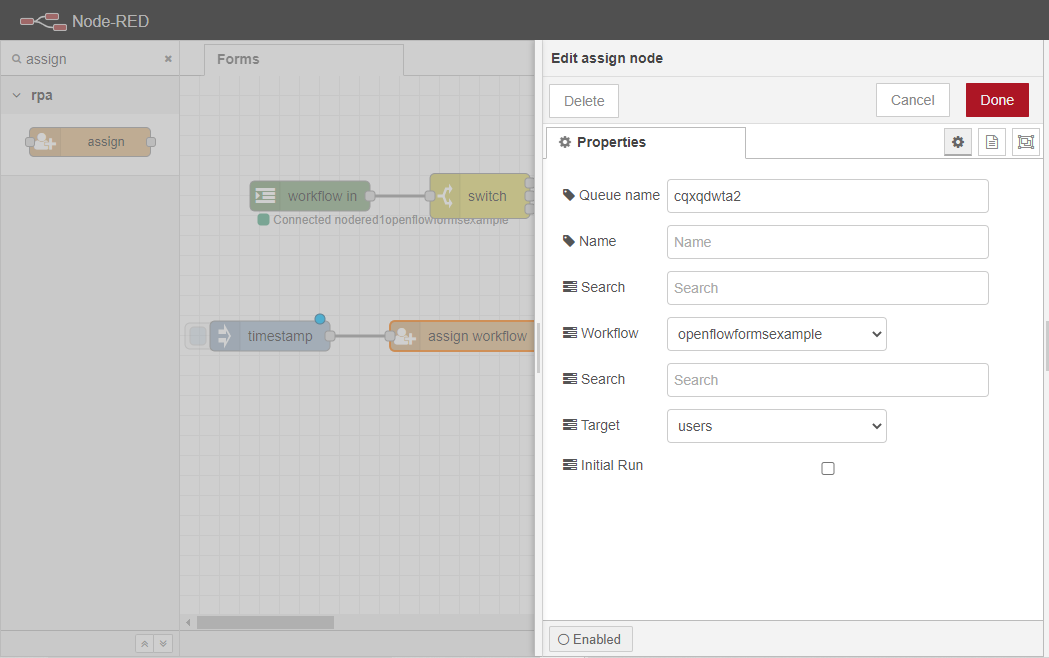
-
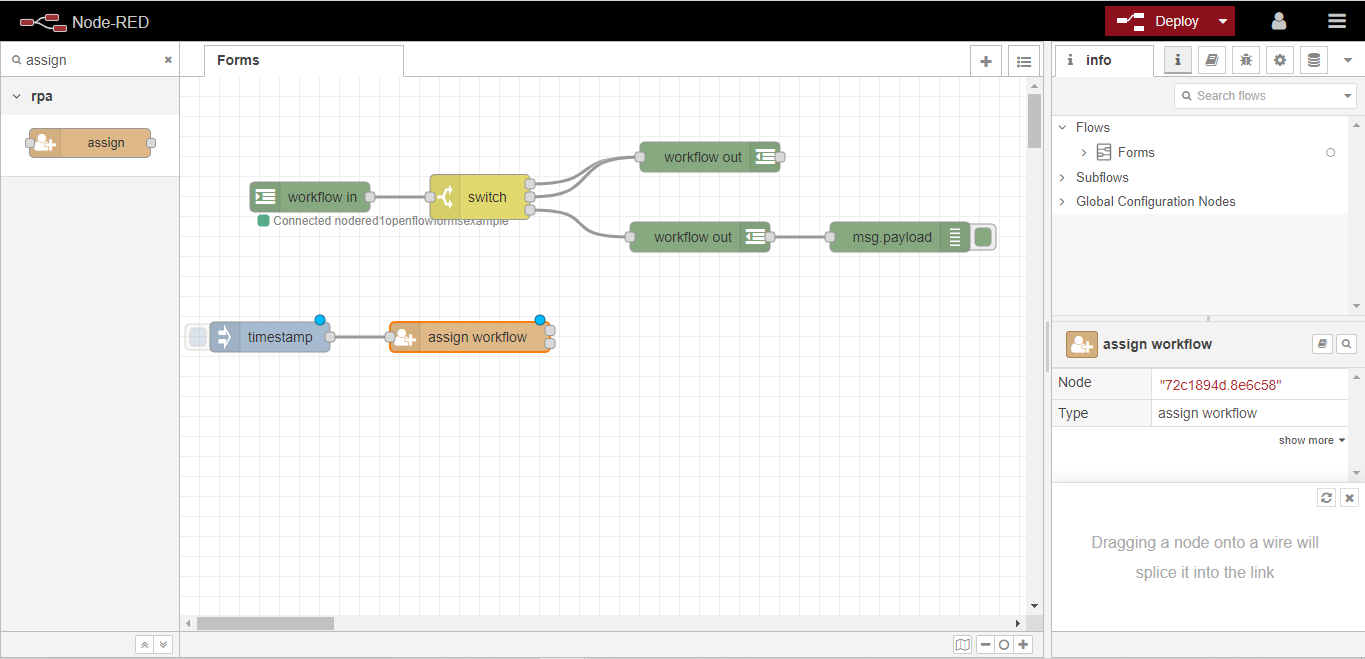
Click the Deploy button to update the Flow.
-
Click the button inside the
injectnode to assign an instance of the Workflow to theusersrole. -
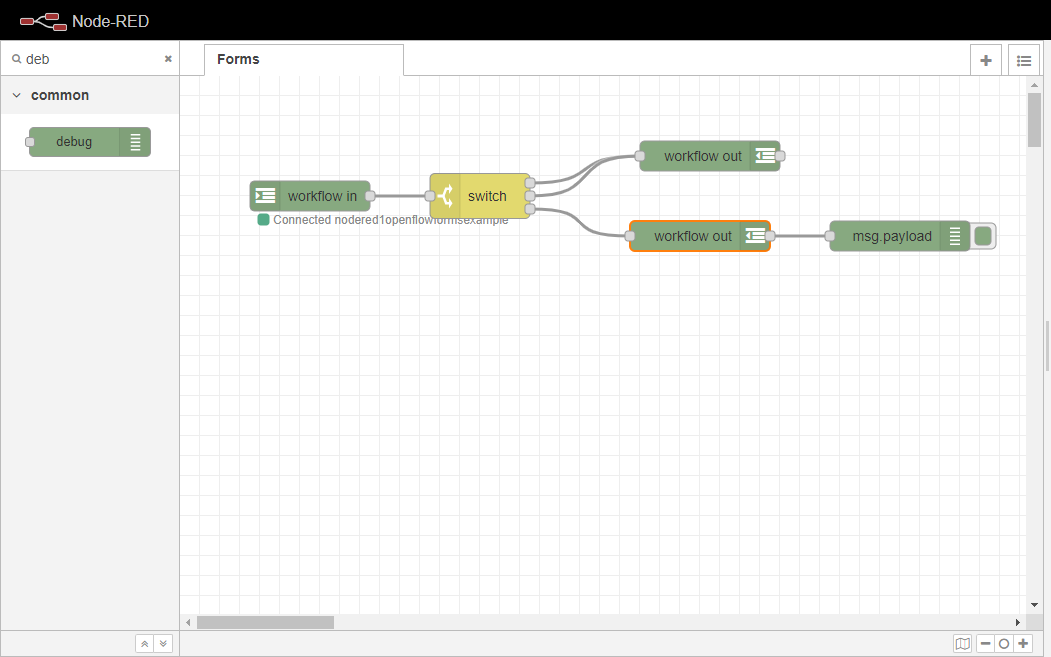
Navigate to OpenCore’s home page to see the instance of the Workflow.
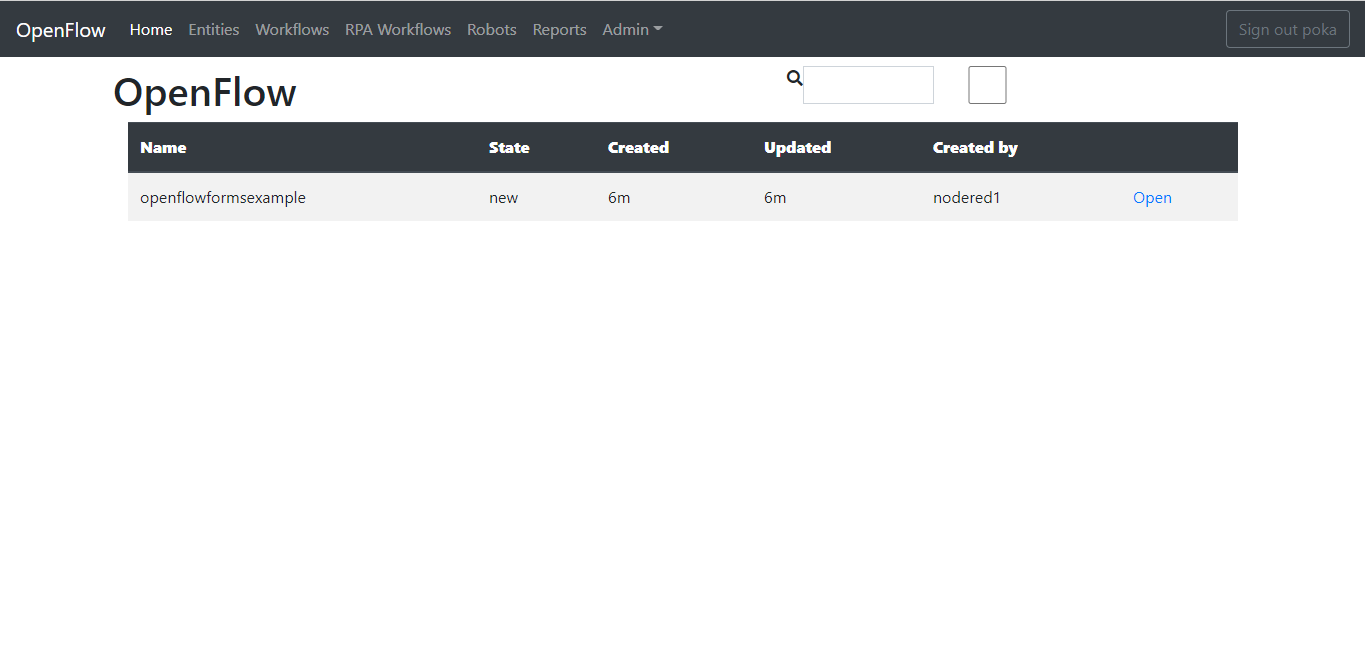
-
Test the Form by entering
Hello from OpenCore!in the text field and clicking the Submit button. A debug message will appear in Node-RED.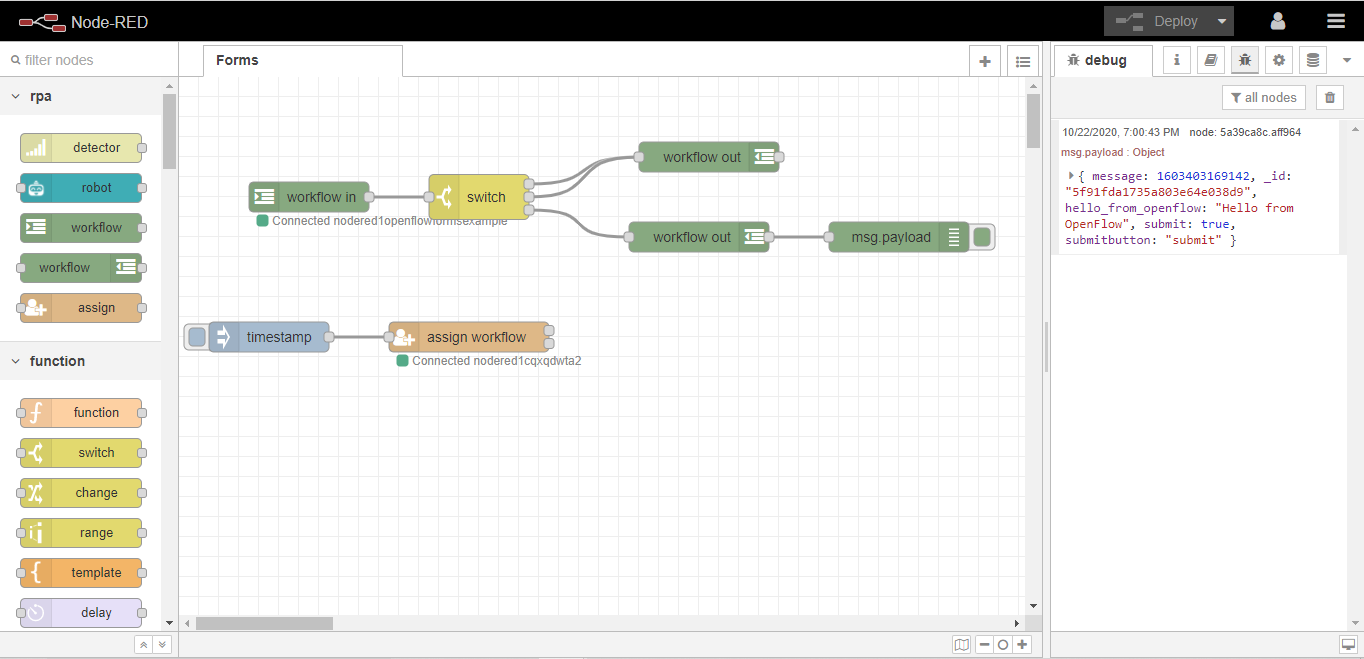
This completes the process of invoking the Form using Node-RED. Users can now test and interact with the Form they have created.
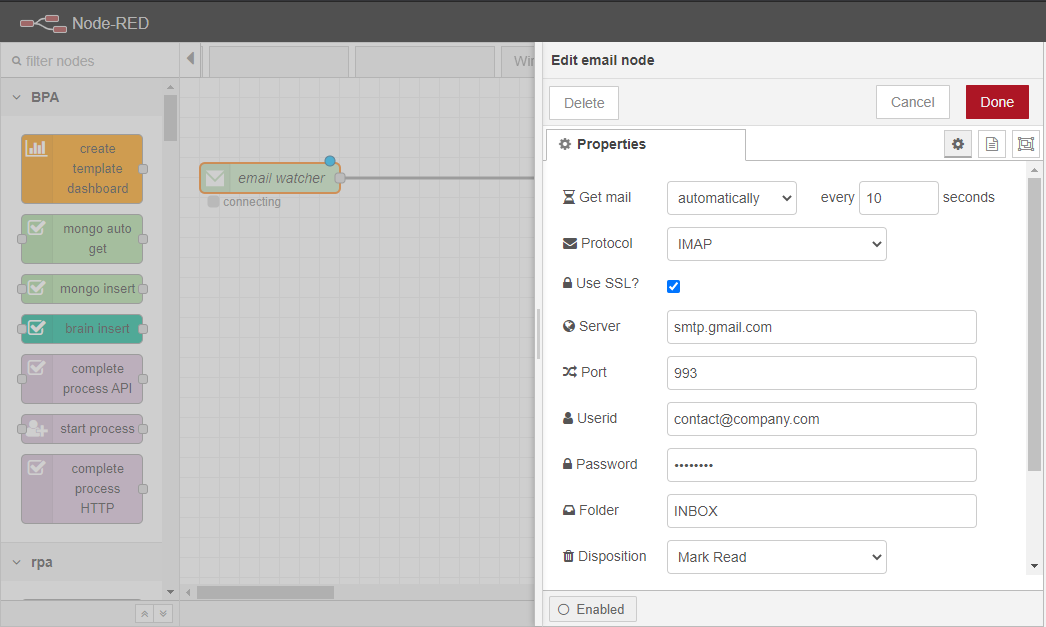
Email Receive, Send
There are two types of “email” nodes in Node-RED: “email watcher” for receiving emails and “email sender” for sending emails.
Receive Emails
Setting Up Email Watcher
The email watcher node searches for new emails from an IMAP server and forwards them as messages.
- Configuration:
- Provide e-mail ID and password.
- Set “Disposition” to “Mark Read” to avoid constant messages about the same emails.
- Use the suggested port (993).
- Some e-mail services require enabling less secure apps for access.
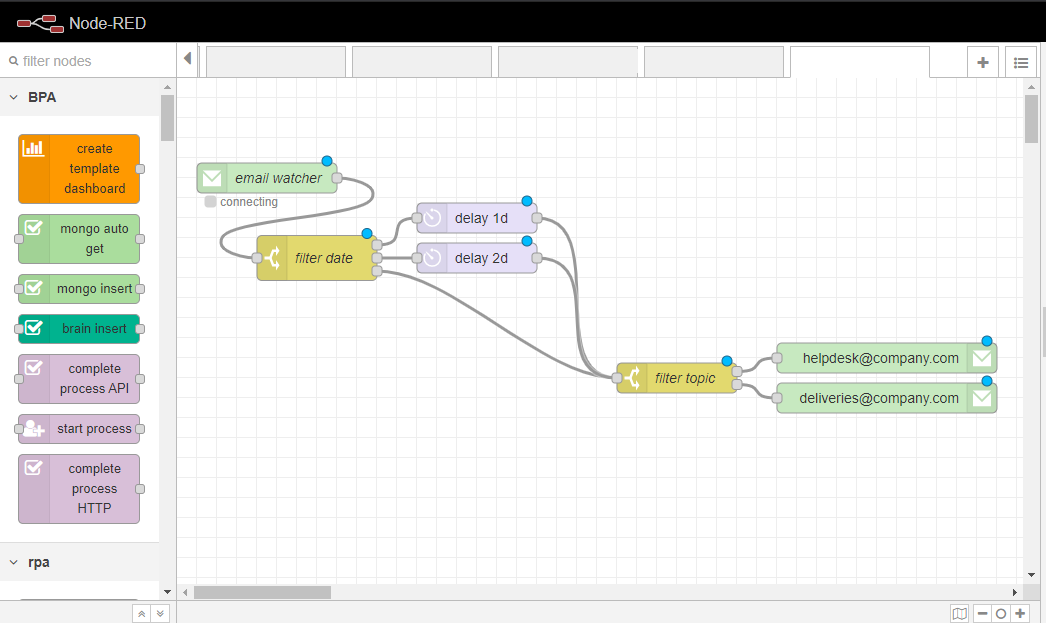
Redirecting Emails
A “switch” node filters messages based on properties like msg.payload, msg.date, or msg.from. For instance, msg.date can be used to delay redirecting weekend emails to Monday.
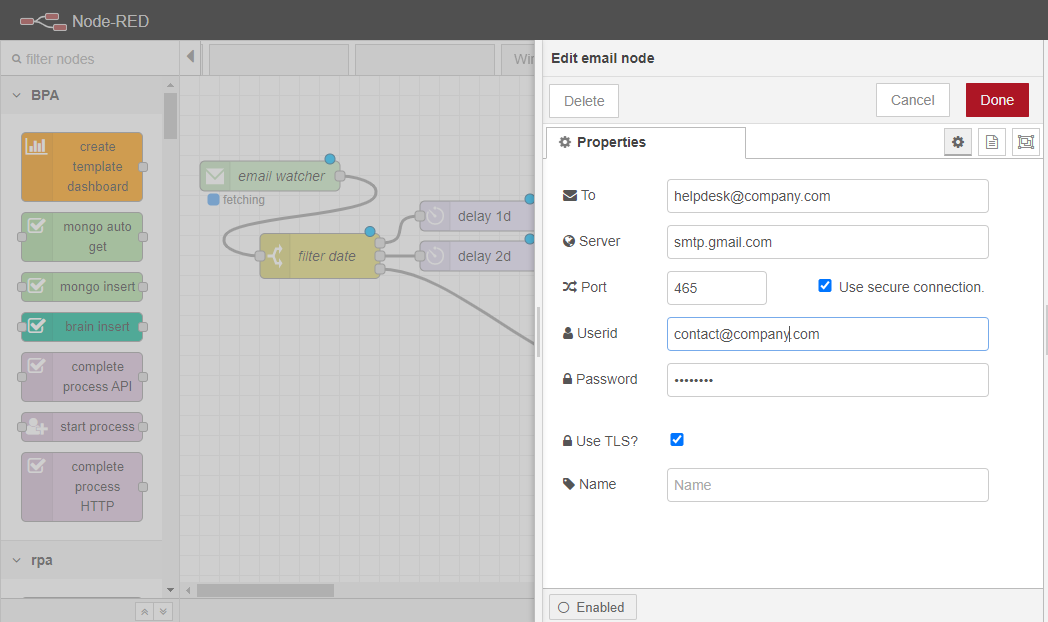
Send Emails
Using Email Sender
The email sender node sends an email to the specified address. It requires an e-mail address and password of the sender.
Creating an HTTP Endpoint
API’s Basic Structure
To create an HTTP endpoint in Node-RED, use “HTTP In” and “HTTP Response” nodes.
Steps
- Drag the “HTTP In” and “HTTP Response” nodes into the Workspace and connect them.
- Add a “Template” node for HTML content between these nodes.
- Configure the “HTTP In” node:
- Method: “GET”
- URL: “/homepage”
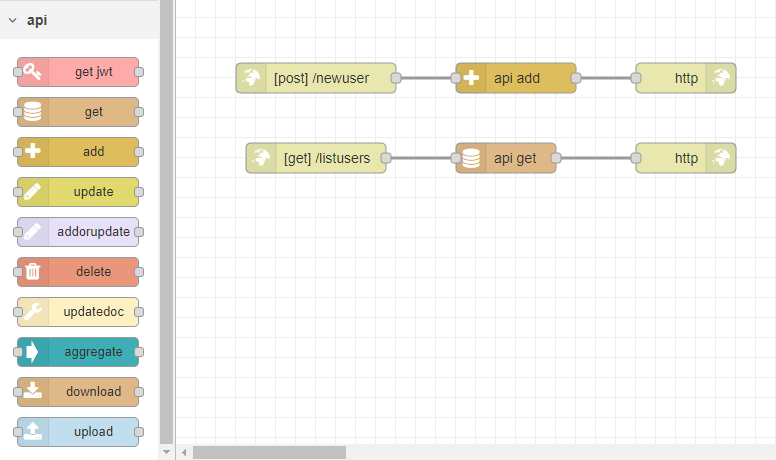
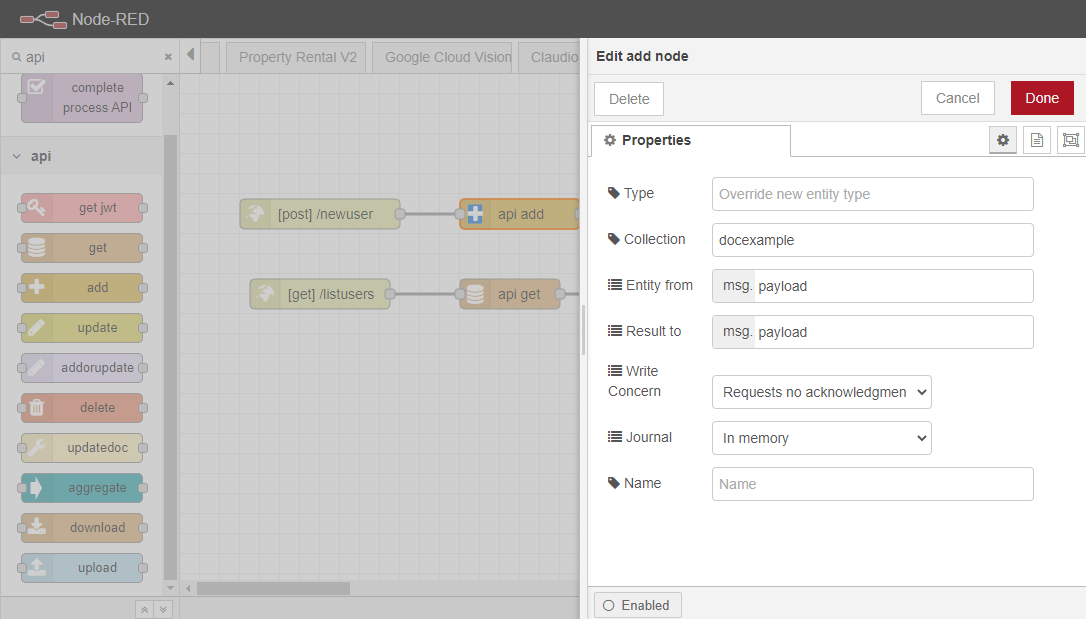
Creating a Database and Adding New Items
To add items to a MongoDB database, use a “HTTP In” node with a “POST” method and an “Add” node from the API category.
Steps
- Configure the “HTTP In” node with the method “POST” and URL “/newuser”.
- Configure the “add” node with collection details and input/output fields.
- Test the API using an API tester with a “POST” request and JSON formatted body.
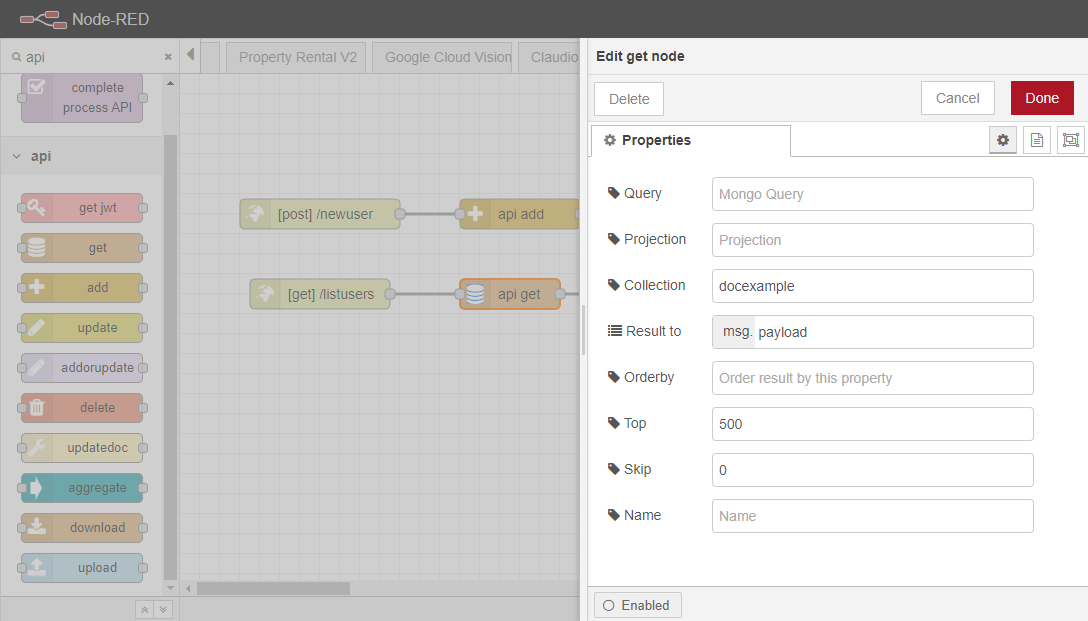
Get a Full List of Items
Retrieve a list of all items using the “HTTP In” node with a “GET” method and a “Get” node.
Steps
- Set the method of the “HTTP In” node to “GET” and URL to “/listusers”.
- Configure the “get” node to retrieve the desired information.